Ubiquiti Unifi Cloud Key on a Budget — Using a Raspberry Pi, Docker and Webmin
Sometime last year, I decided to build a pretty intense network setup using an array of Enterprise Ubiquiti networking gear. I decided to challenge myself and create this network on my own. This is how it went…
I started this journey because I had fiber installed at home, but the ISP router was not a good match for it. The router only had about five Ethernet ports and guess who was using them all? Me!
So that was all fine and well, but what about WiFi? I have had my fair share of experience with extenders and lets just say they’re pretty insecure. So I decided I wanted full control over the network and the ability to incorporate statistics and anything else I could think of.
When you build a network with Ubiquiti networking equipment, you can control everything using a Unifi Controller Cloud Key. After some research I had found them to be on the pricey side. Besides that, the articles I had dug up determined that all of the “cloud key greatness” could be done on a Raspberry Pi!
I had a spare Raspberry Pi laying around so it seemed like the perfect opportunity to test this out. I went onto find that the OS and burn Raspbian Lite image was easily downloadable onto an SD Card. With a few simple steps I was ready to go.
I used this setup for a few months and it was pretty impressive.
But what about software updates?
Each time I logged into to my controller it would pop up the following:

The controller notified me about firmware updates too, and things got a bit messy with updates. I attempted to update the controller software and it would simply download the file which meant I would need to backup its software network settings and burn a new image for every update. The controller software update seemed painful and I was not about to go down that rabbit hole, which meant I just used an outdated controller for months. Yes, I know, how embarrassing.
Around this time a friend and I were working on some projects in docker. I did see a docker image on the hub for the Unifi Controller. I thought it would be convenient to convert my current controller setup from Raspbian Lite into Docker, that meant I would no longer have to worry about the controller software update notifications anymore. The updates would be handled by a little something called WatchTower.
I will take you through how I got this all setup.
Lets get started!
Retrieving Backup
Before destroying my Raspbian Lite setup, which had my Unifi Controller running, I first wanted to download a backup of my network settings so that I could restore it later, and this would make the migration a lot easier.
All I did was login to my Unifi Controller click on Settings>System Settings>Maintenance>Backup/Restore
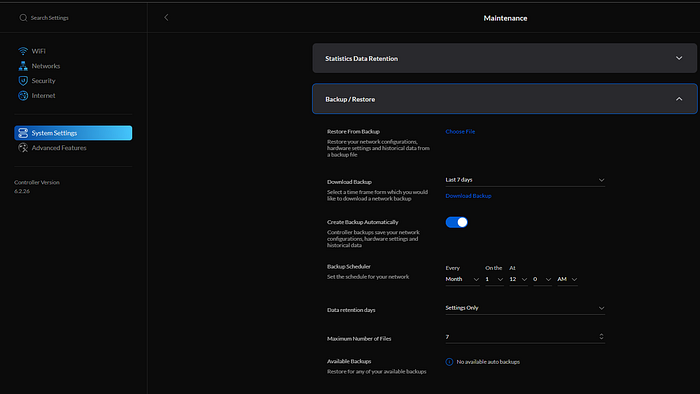
I downloaded the available backup I wanted:

Now we know we have the backup we downloaded from our previous setup waiting to be restored.
DietPi Setup
Download latest dietpi image: https://dietpi.com/#download (32 Bit)
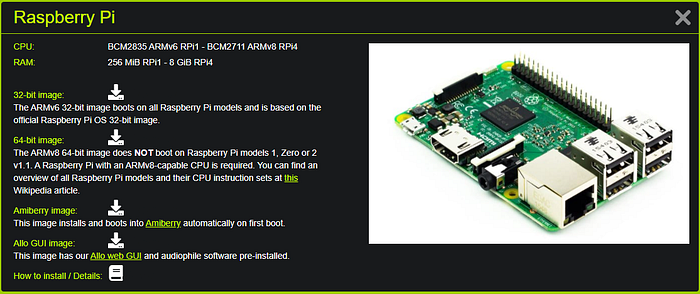
Burn the image onto your SD Card.
Installing Docker and Webmin Packages in DietPi
Once you have installed the DietPi image onto your Raspberry Pi, you need to install two packages from DietPi:
- Webmin
- Docker Build
You can do this by running the following command:
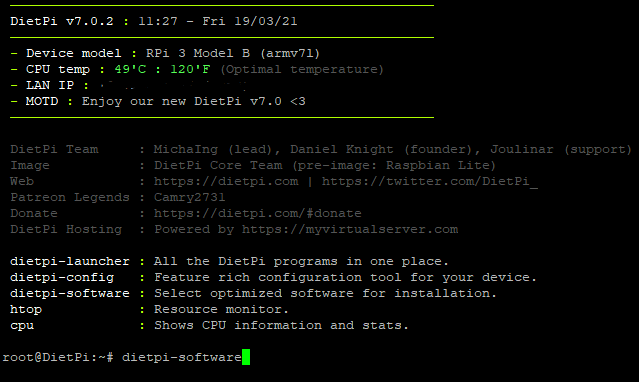
You will then be presented with this screen, and you will have to select “Software Optimized”
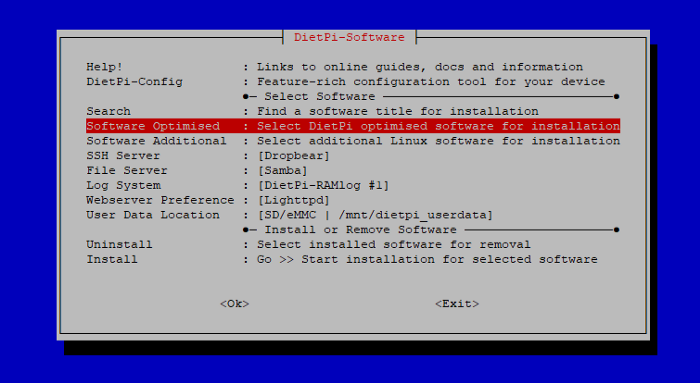
Make sure to select ID 115 and 162 with space bar

All you need to do now is select install to install the packages required for the setup.
Installing Portainer
Portainer is an application that is used to easily manager your docker containers. In this article, we will be making use of docker-compose and deploying a stack.
First you will to navigate to this link: https://documentation.portainer.io/v2.0/deploy/ceinstalldocker/
Follow the instructions to setup your Portainer Server Deployment:

Make sure to run the commands as is, and do not change anything.
Once this has been completed you can now launch Portainer.
<IP Adress>:9000
Login with admin and create a new password.
When you launch Portainer for the first time, it will look something like this:

First launch of Portainer.
Click on local.
When inside local you will be presented with your Dashboard.
Setting up Unifi Controller and Watch Tower in Portainer
We have docker running, so now what we want to do is setup our Unifi Controller and Watch Tower compose files.
You have Portainer running, you now need to create your stack.
WIthin Portainer navigate to the hamburger menu on the left and select Stacks.
Select Add stack.
Name your stack Unifi (or the name of your choice).
Unifi Controller docker compose setup
You are going to run Unifi Controller in a docker compose file within docker.
Paste your Unifi Controller settings in docker compose file inside the Web editor
found here:
https://hub.docker.com/r/linuxserver/unifi-controller
Things to lookout for when setting up your docker-compose file:
- Environment variables for PGID and PUID is set to 1000 (root access)
- volume pathing variables are correct
I have my Unifi docker configuration settings going to my home directory on the Raspberry Pi like this:
volumes:
— /home/docker/unifi/config:/config
Watch Tower docker compose setup
You are going to run Watch Tower in a docker compose file within docker. But wait, what’s WatchTower?
Watchtower will pull down your new image, gracefully shut down your existing container and restart it with the same options that were used when it was initially deployed.
Paste your Unifi Controller settings in docker compose file inside the Web editor.
found here:
https://hub.docker.com/r/linuxserver/unifi-controller
Once you have pasted your docker-compose setting for both the Unifi Controller and WatchTower inside the web editor you need to ensure “Enable access control” is toggled on and Administrator is selected and then click on Deploy this stack:

Now you can deploy your stack and it will appear under stacks:

You do have the ability to edit your stack on the fly should you feel the need to do so by selecting the editor, but you would need to redeploy the stack to apply the changes.

If you navigate to containers, you should see the containers you have added to your docker-compose file running.

Mounting you NAS Shared Backup Drive
You need to mount your Backup share drive from your Backup NAS Drive onto DietPi.
Type in the following command to get to the DriveManager setup:
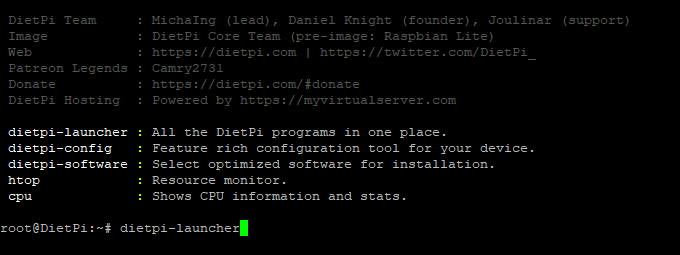
Select DriveManager:

NAS Backup Drive Mount
Next you will need to setup your share drive from your NAS once it is plugged in and powered on.
Select the Add network drive option:

Select Samba:

Enter the IP Address of your NAS where you will be running your docker containers:

Enter the name of your Share folder only, name it “Backup”.
Your shared NAS drive should have the following details:

The drive you have created should appear now on the DietPi-Drive Manager:

What you have done here is made a the Backup Share on your NAS visible on your Raspberry Pi so that you can push your scheduled backups to it daily. This will come in handy when we setup Webmin.
Webmin Setup
Webmin is a powerful tool that provides you with a web GUI to manage a range of tasks within your linux distro.
Webmin is going to be used to set up scheduled back ups of our configuration files. We installed Webmin in the very beginning of this article, so all we need to do is launch it to get started.
When we install DietPi it comes with two users, root and dietpi.
We want to make sure that our folders are all set to dietpi. When we install docker, it creates a folder under /home/docker. Both of these folders have the owner set to root which can be left as is.

Backup docker config files
After putting in so much effort into our setup we want to make sure we have a back up of everything.
I have created a backup in two locations, one in Backup and the other in media-cache.
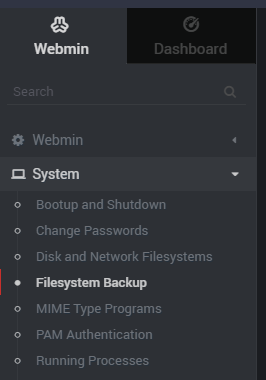
Within Webmin, navigate to System → Filesystem Backup:
Select the directory you want to backup, in this case I want to backup my docker configurations folders:
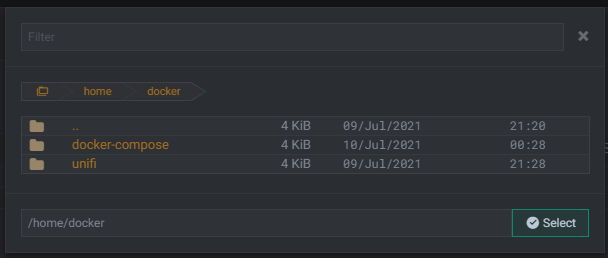
You can now see the folder directory is now set:

When you click on Add new backup of directory you will be presented with this screen:
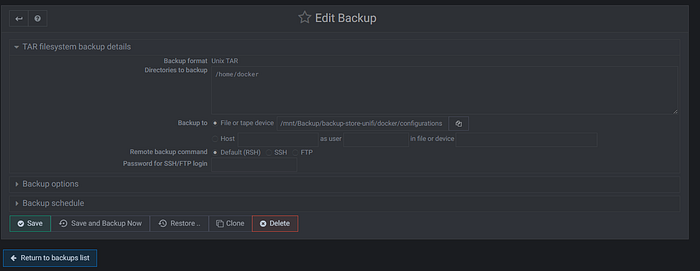
You can see from the above that I am setting the folder I want backed up to go to a specific backup-store-unifi folder I created on my NAS share. When you add the path to be backed up you must add the .tar extension.
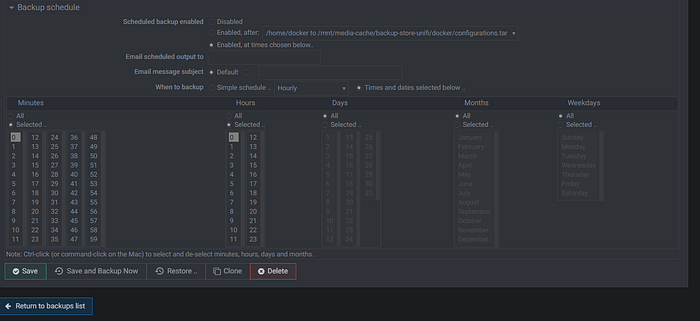
Now you will need to set the Backup schedule.
Here you can see that I have set my own times within the scheduled backup option.
I have specifically set it to Everyday at 00:00 as seen below
You will need to do the exact same thing for the media-cache folder.
Once you have set this up, the scheduled backups should look like the following on Webmin:

Now you have your backups on an SD card in your Raspberry Pi within media-cache on a shared backup folder on the network. You could take this one step further and have the shared backup folder pushed to a public cloud such as Google Drive. This out of the scope for this tutorial.
How to Restore from Backup
Find the backed up .tar file in your share Backup folder

Within Webmin naviagte to System>Filesystem Backup
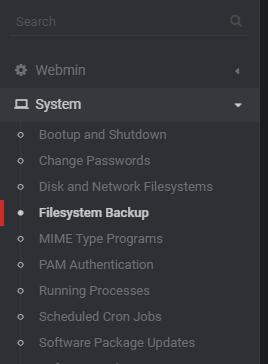
Now you want to “Restore backup of filesystem”

Now you want to change a few things here
Restore from file or device, point it to the file you want to restore onto the system.
Restore from file or device, point it to the file you want to restore onto the system.
- Restore to directory put “/”
- Only show files in backup make sure “No”
Conclusion
I am excited to see how all of this works out in the next few months to come. I now have a Unifi Controller up and running with automatic updates using WacthTower with the help of the wonders of Docker. And, of course, everything is backed up with the awesome admin tool, Webmin. This project is just scratching the surface with what you can do on a Raspberry Pi and Docker! I hope you had as much fun reading this as I did writing it. Keep your eye out for the next one! :)